
Author
Naman Singhal
23 February, 2025
A hanging indent is a type of formatting where the first line of a paragraph is flush with the left margin, and the rest of the lines in the paragraph are indented.
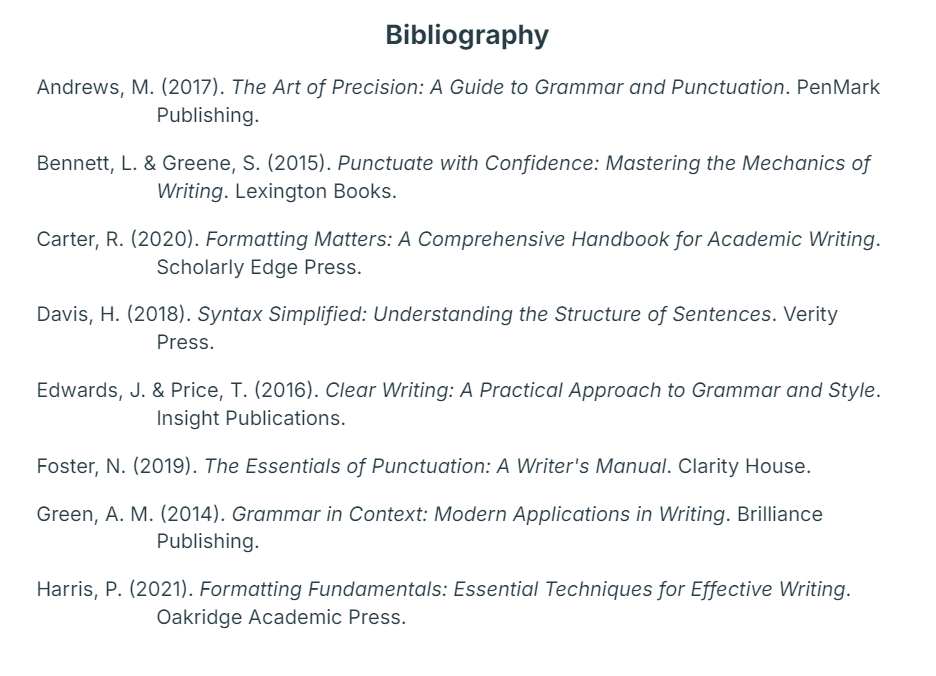
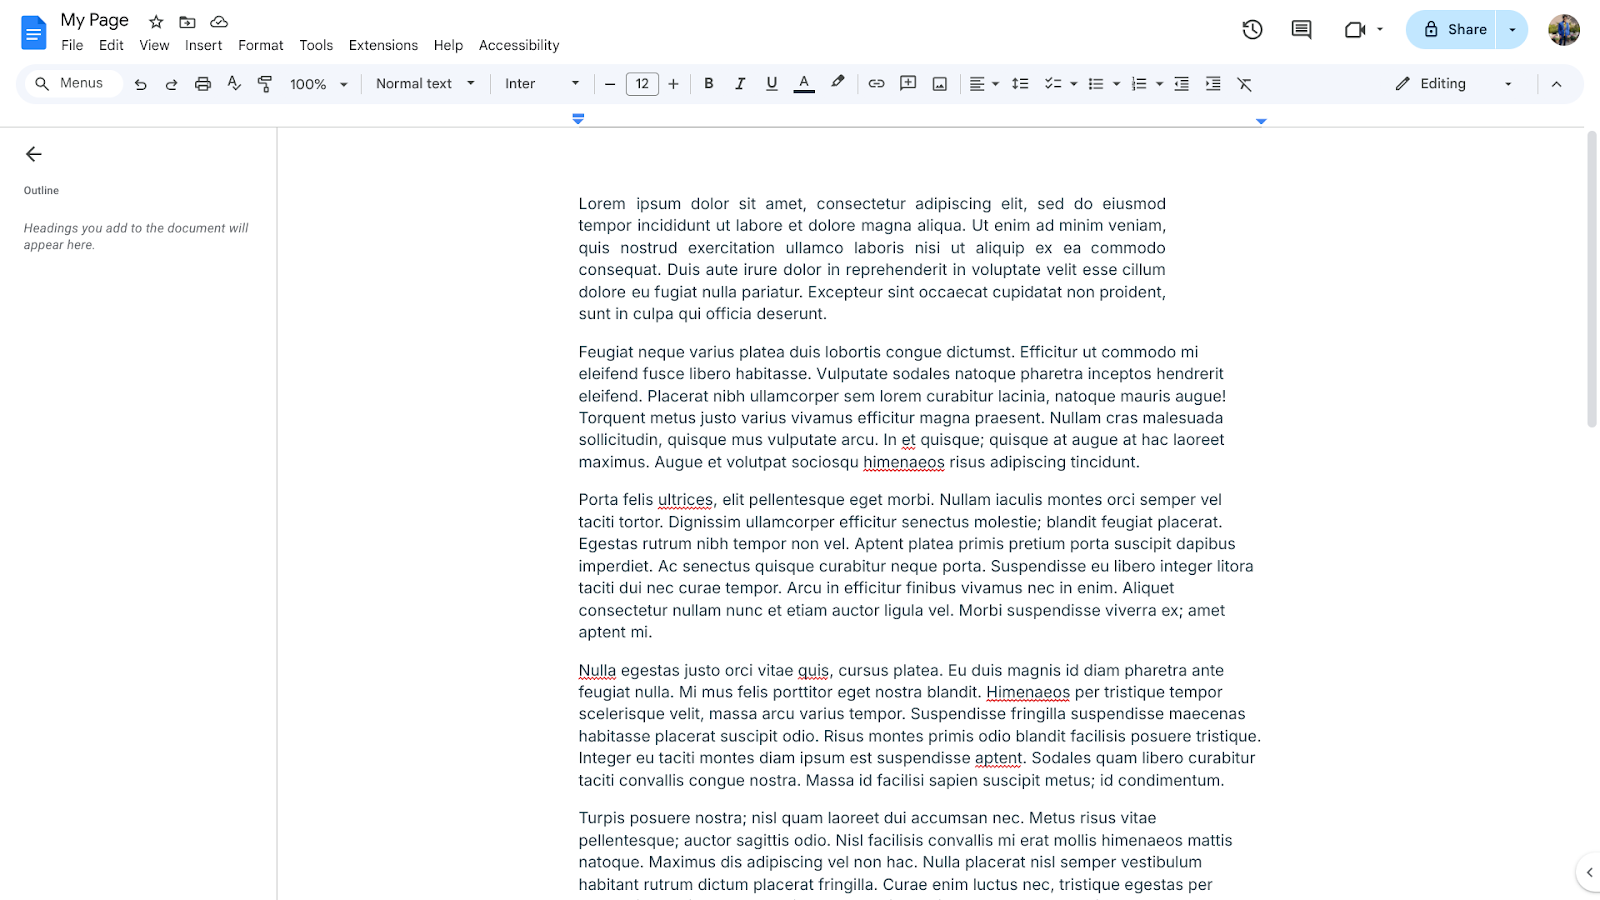
This is useful for things like bibliographies and reference lists, where you need the first line of each entry to stand out, making it easier to scan and read, as in the example below:
In this article, we’ll provide a step-by-step guide on how to create a hanging indent in Google Docs, so you can easily format your references clearly and correctly.
How to Create a Hanging Indent in Google Docs
TL:DR: If you are in a hurry, you can simply use the keyboard shortcut to create a hanging indent. Just type Alt + O, A, O in quick succession and it will open up the indent menu.
However, if you need more detailed instructions, then here’s how to access and configure the hanging indent option in Google Docs.
- First, open your Google Docs document and place your cursor at the beginning of the paragraph in which you want to apply the hanging indent.
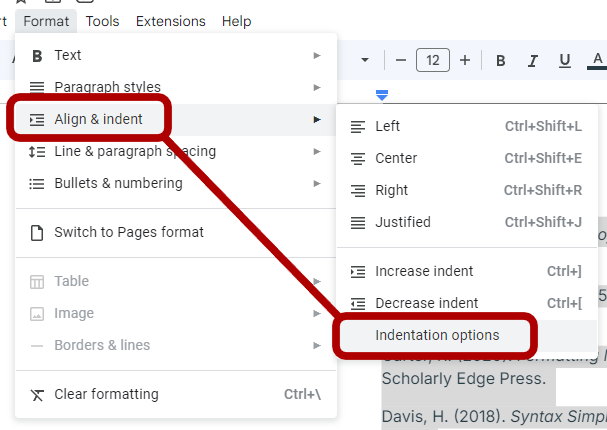
- Next, go to the “Format” menu and select “Align & Indent“.
- In the “Align & Indent” sub-menu, click on the “Indentation options” tab.
- Once you click the “Indentation options”, a new modal will pop up on your screen. In this modal, look under the “Special indent” section.
- In the “Special indent” section, click on the dropdown menu and select “Hanging” to apply the hanging indent to the selected paragraph.
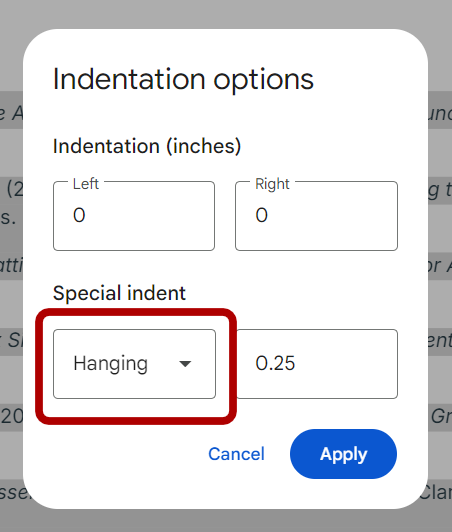
- Next, enter the indent value in the text box next to the dropdown menu. For example, to enter the indent of 0.25 inches, type in “0.25”.
- Click “Apply” to apply the hanging indent to the selected paragraph.
Customizing Indents in Google Docs
After adding the indent, you can easily adjust the size of the indentation for the other lines by modifying the “Left” and “Right” values in this menu.
“Before” determines how far the first line is indented from the left margin. In the following example, we can see that the first paragraph has a left indent of 0.5 inches; therefore, all the lines in the entire paragraph have 0.5 inches of blank space to the left.
Similarly, “Right” determines how far the remaining lines are indented from the right margin. In the following example, we can see that all lines in the first paragraph are ending before the rest of the paragraphs in the document.
Configuring Hanging Indent by Default
In addition to adjusting the indent size, you can also set hanging indent as the default for a specific paragraph style in Google Docs. This can be useful if you need to apply the same hanging indent formatting to multiple paragraphs throughout your document.
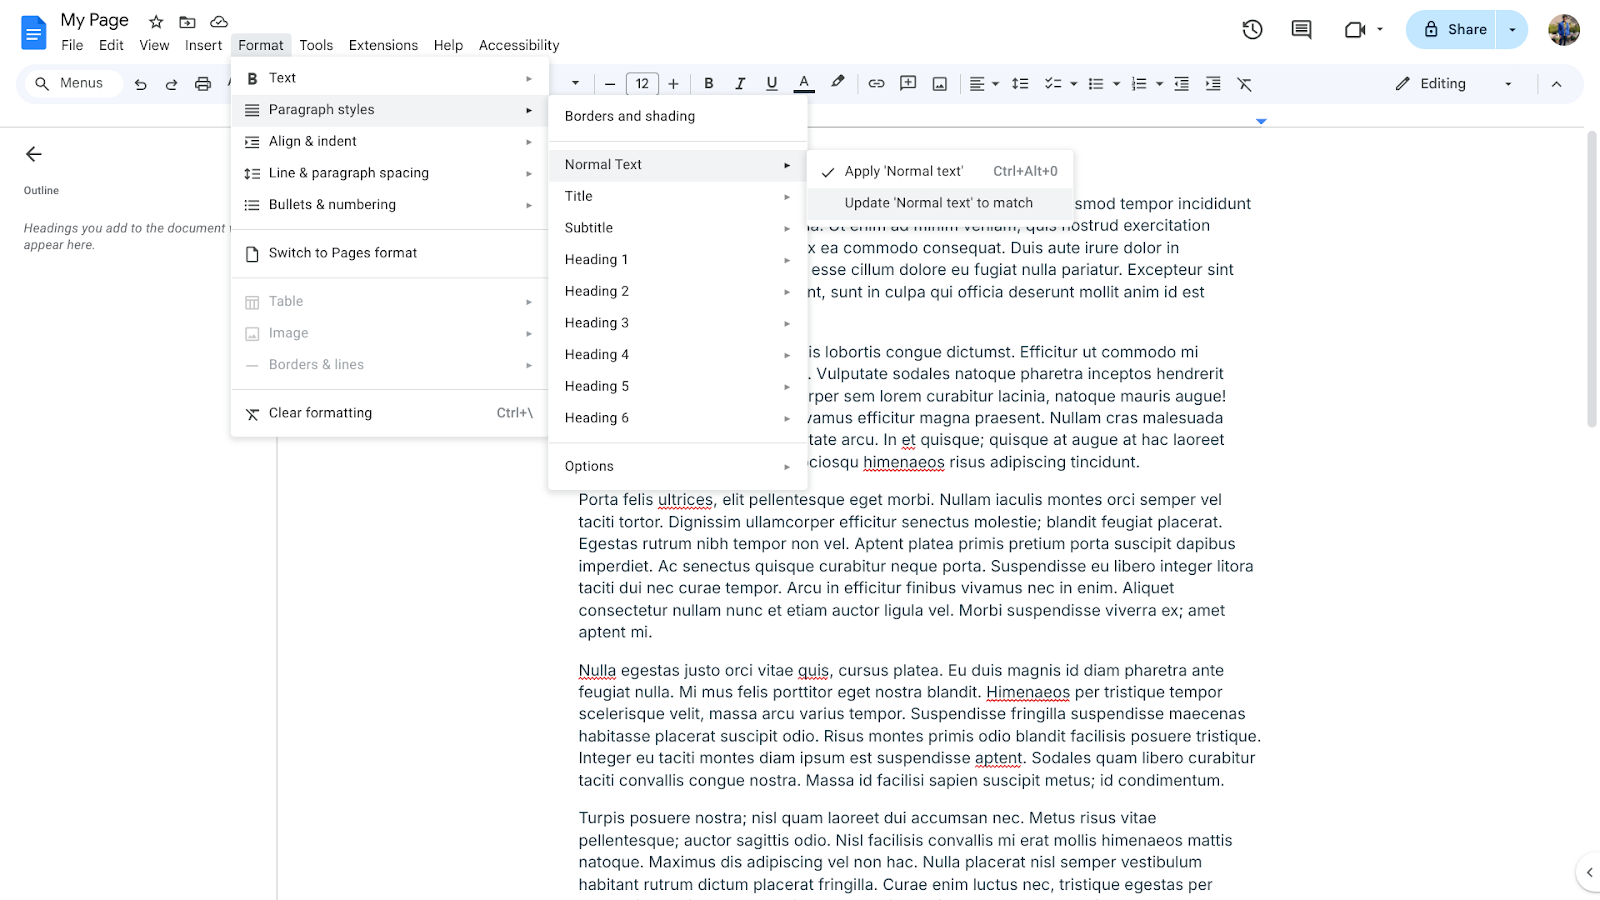
- In the “Paragraph styles” menu, select the style you want to modify.
- Click on the “Options” menu next to the style and choose “Update ‘Style Name’ to match“. For example, if you want to change the indent option for the “normal text” style, then click on the “Update ‘Normal Text’ to match” option.
- Once you update a text style, it will be applied to the entire document automatically. Additionally, whenever you apply that style to your text, the specified indent styles will be automatically applied.
Conclusion
In this article, we’ve covered the basics of using hanging indents in Google Docs. Now that you know how to create and customize hanging indents in Google Docs, we encourage you to start experimenting with this feature in your own documents.
Whether you’re formatting a bibliography, a reference list, or any other text that would benefit from a hanging indent, give it a try and see how it can improve the organization and readability of your work.

Join our newsletter for
the latest in SEO & content