How to set up workflows and approvals
A workflow is the list of steps a document goes through in one project, for example Draft, Review, Ready, and Published. Each step can do something when a document gets there, such as notify a reviewer, and can ask for something before the document moves on, such as an approval or a checklist. A project without a workflow keeps Workover’s standard statuses.
Before you start: you need to be a workspace owner or admin, or an Owner or Admin in the project, to set up or change its workflows. Everyone else in the project can see them. See Roles and permissions.
Set up a workflow from a template
- Open the project and select Project settings.
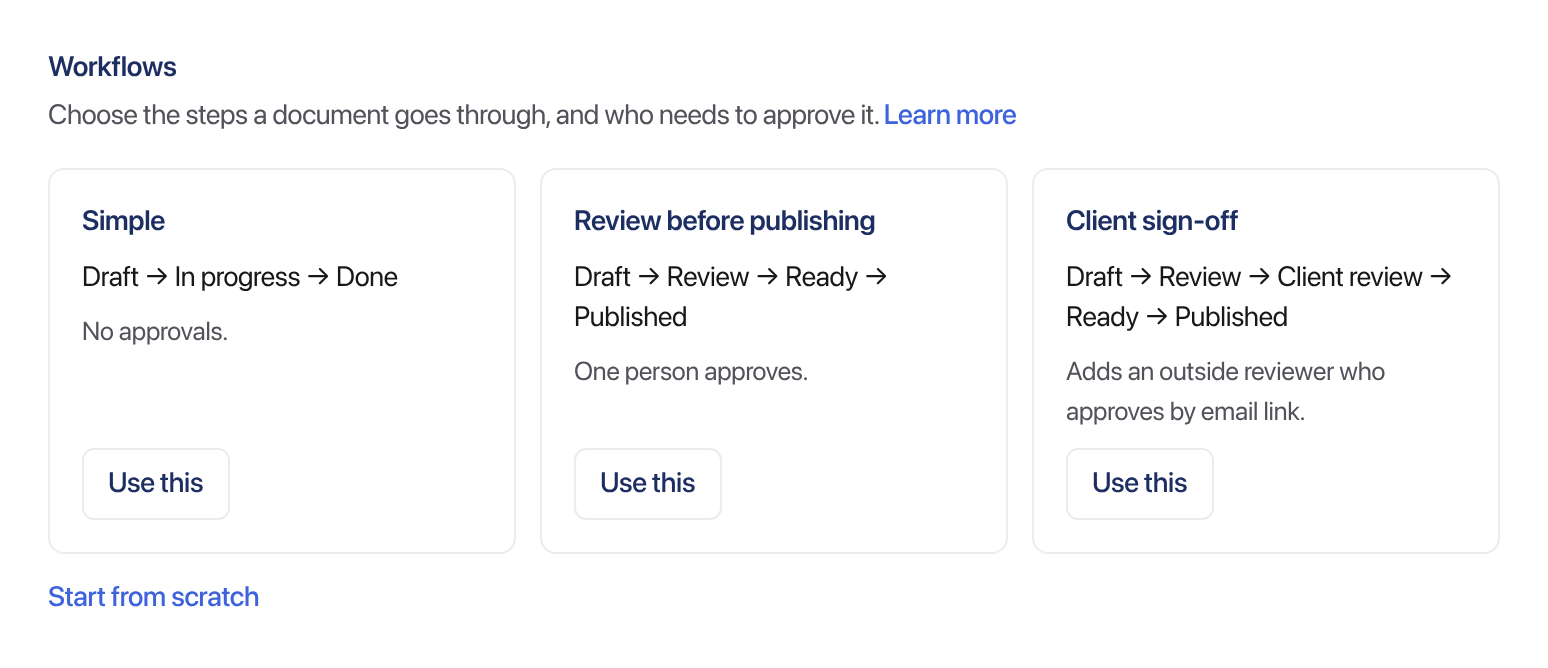
- Under Workflows, choose a template and select Use this:
- Simple: Draft → In progress → Done. No approvals.
- Review before publishing: Draft → Review → Ready → Published. One person approves.
- Client sign-off: Draft → Review → Client review → Ready → Published. Adds an outside reviewer who approves by email link.
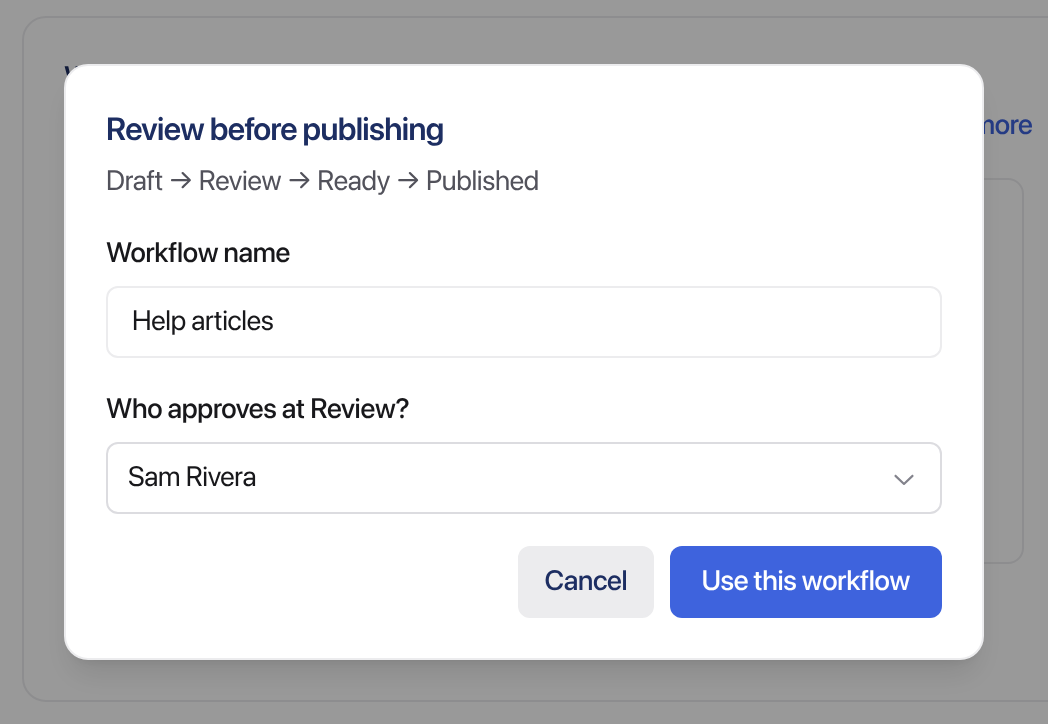
- Enter a Workflow name. For the two review templates, choose Who approves at Review?. For Client sign-off, also enter the Client’s email: they get the document by email at Client review and can approve it there.
- Select Use this workflow.
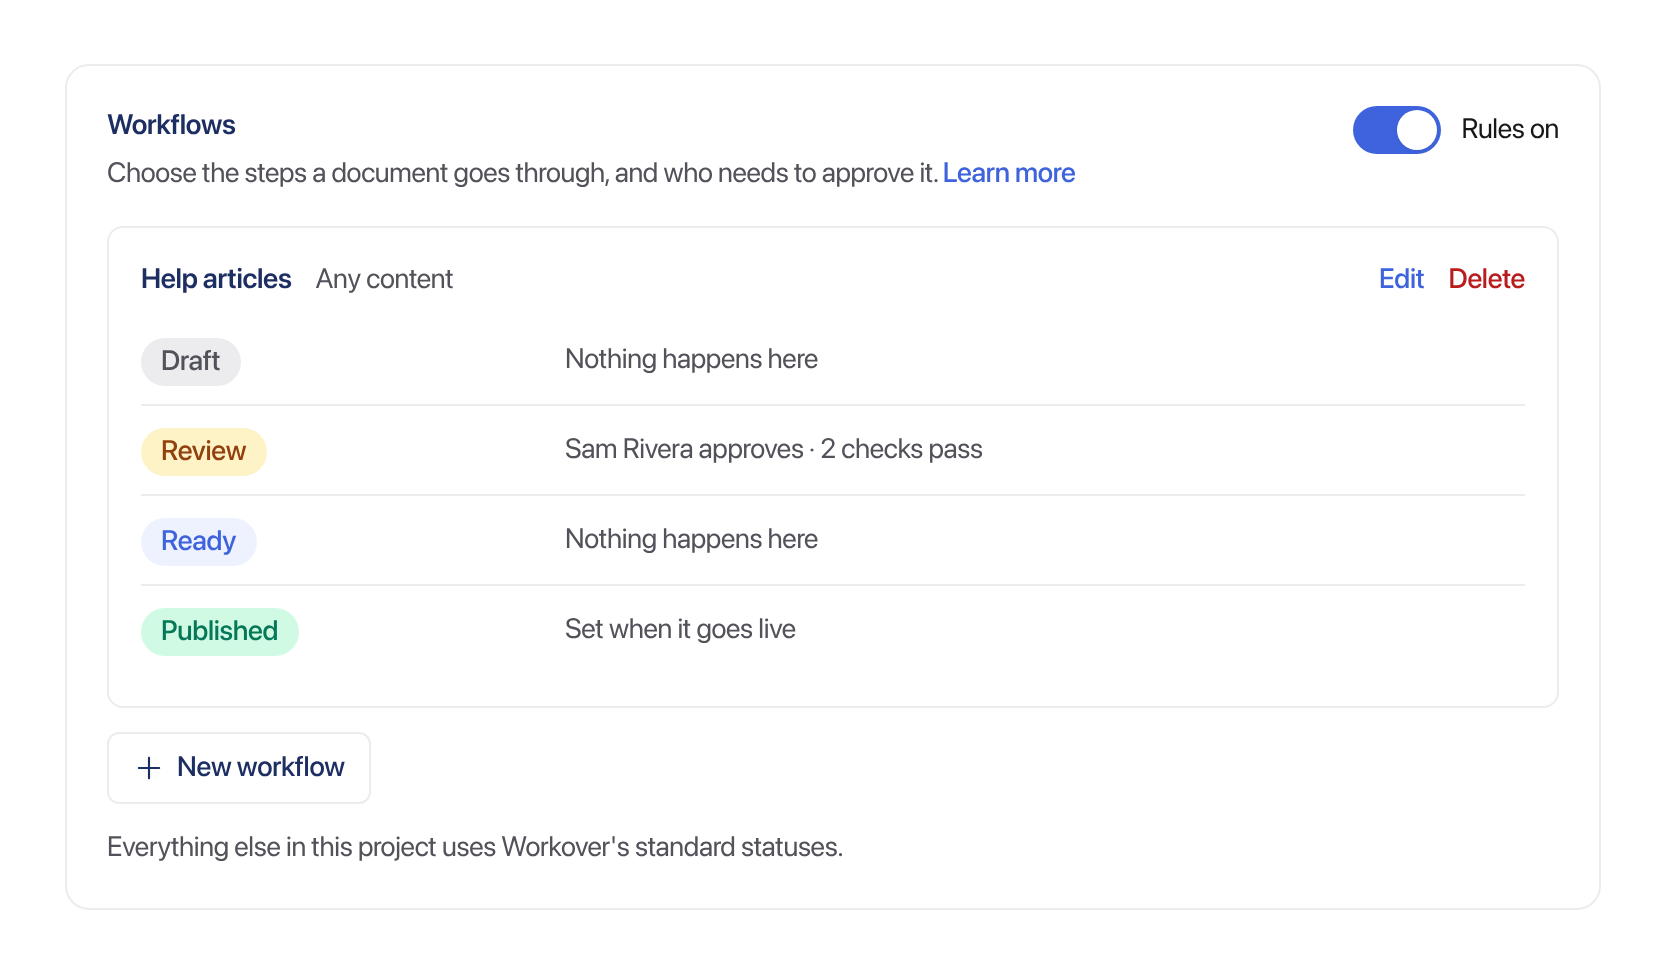
The workflow appears as a path, one line per step, saying what happens there.
To build one yourself, select Start from scratch instead. If another project already has a workflow you want, pick it from Copy a workflow from another project.
Change a workflow
Select Edit next to the workflow.
- Give it a Name, and choose what it Applies to: a content type such as posts, or Any content. Use Only with these categories or tags to narrow it further.
- Under Steps, click a step to change it. Use Add a step for a new one, and the arrows to reorder.
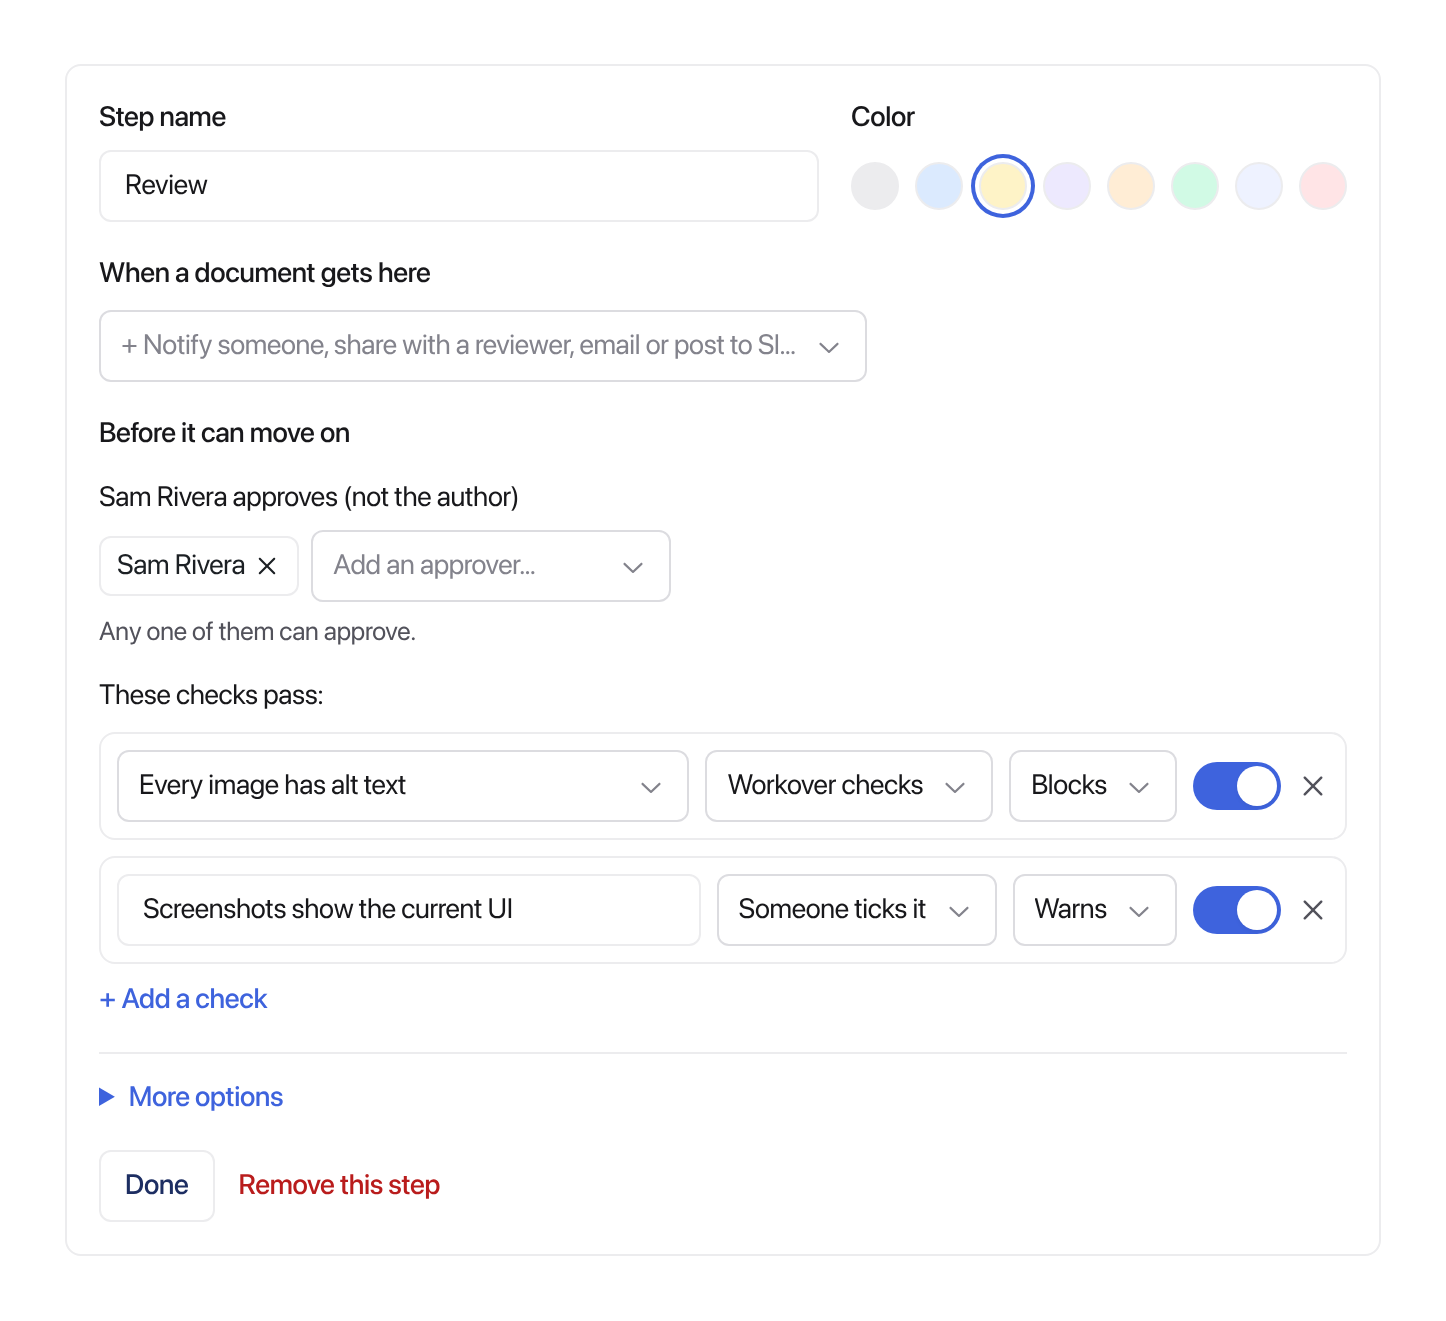
- For each step, set its Step name and Color, then:
- When a document gets here: add what happens when a document arrives. Choose Notify people (inbox and email), Share with a reviewer to approve, Email someone, or Post to a Slack channel. Each action has its own switch, so you can pause one without removing it.
- Before it can move on: select + Require an approval or checks. Add approvers by name or by role (Any project Owner, Any project Admin, or Any Editor). Any one of them can approve.
- Under These checks pass, select + Add a check. Choose whether Workover checks it or Someone ticks it, and whether a failed check Blocks the document or only Warns.
- Select Save workflow.
The checks Workover can run for you are:
- Every image has alt text
- Featured image set
- Meta description, 120–160 characters
- No tracking parameters in links
- No links to unpublished documents
- House style rules (the mechanical ones)
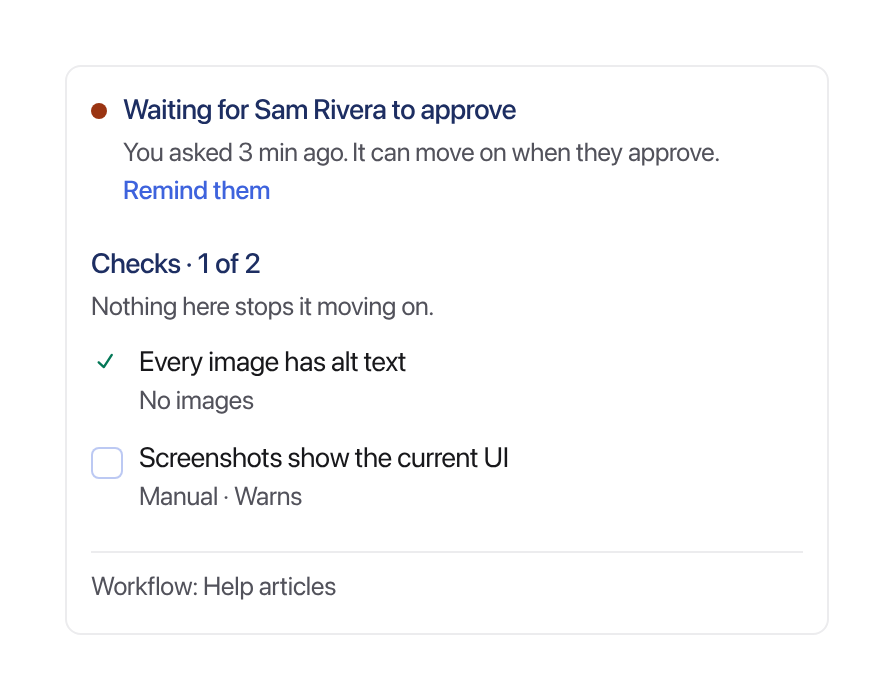
Anything else, such as “Screenshots show the current UI”, is a check someone ticks.
More options for a step
Open More options on a step to:
- Limit Only these people can move it on.
- Turn on The author can approve their own changes (every step of this workflow). It is off by default, so authors cannot approve their own work.
- Mark This step can be skipped.
- Mark The approval is optional, for a reviewer who may not answer.
The last step
The last step asks How does a document get here?:
- When it’s published: set automatically when the document goes live on your site.
- Someone moves it here: for a project that does not publish to a site. Any approval or checks on the step before still apply.
Under its More options you choose Who can publish (or Who can mark it done), your Trusted publishers, whose small fixes after an approval go live without a new approval, and where a published document goes when someone edits it, under When a published document is edited, move it to.
What your team sees
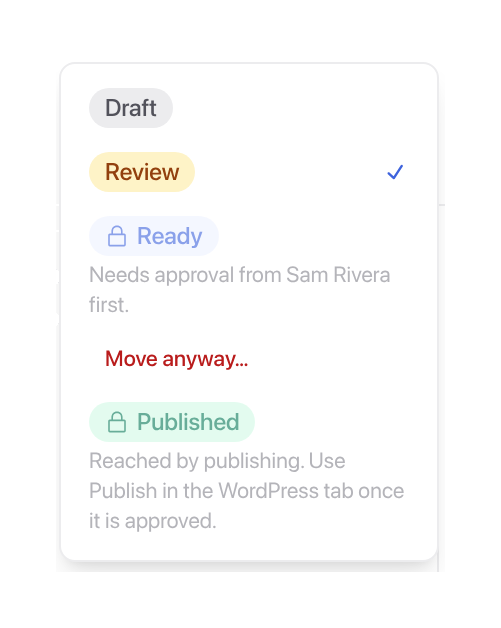
When a document reaches a step that needs an approval, the approvers are notified. In the document’s status menu, the steps after it are locked and say what they are waiting for.
The edit panel shows who the approval is waiting for, with Remind them, and each check with whether it passes.
Until the approval is given, publishing is locked, and the WordPress tab says why, for example “Needs approval from Sam Rivera before this can go live. You can still save it to WordPress as a draft.”
Approve a document
Approvers find requests in Inbox, under For you, with the Approvals filter. Select one to see who asked, the step it moves to, the text, and the checks. Then choose:
- Approve to move it to the next step.
- Approve and publish, when it is offered, to approve and send it live on WordPress in one go.
- Request changes to send a note back to the person who asked.
If a trusted publisher changes a document after you approved it, your inbox shows what changed, with Looks good to let your approval cover the change, or Restore approved version to put back the version you approved.
Publish or move without an approval
When something has to go out and nobody can approve it, workspace owners and admins, and the project’s Owners and Admins, can choose Publish anyway…, or Move anyway… under a locked step in the status menu, and give a reason. The reason is recorded in the audit log and emailed to the workflow’s approvers. Neither works through an API token.
Pause a project’s workflows
Switch off Rules on at the top of the project’s Workflows settings. You are asked for a reason, and the approvers and the workspace’s owners and admins are emailed. While the rules are off, the project uses Workover’s standard statuses: nothing needs an approval or checks, and nothing happens when a document reaches a step. Your workflows are kept, and switching the rules back on brings them back.
See every project’s workflows
Workspace owners and admins can open Settings → Workflows to see every project in the workspace, including projects they are not part of. Each project with a workflow shows how many it has, its Rules on switch, and Open, which shows the same settings as Project settings. Projects without one are listed under the standard statuses.
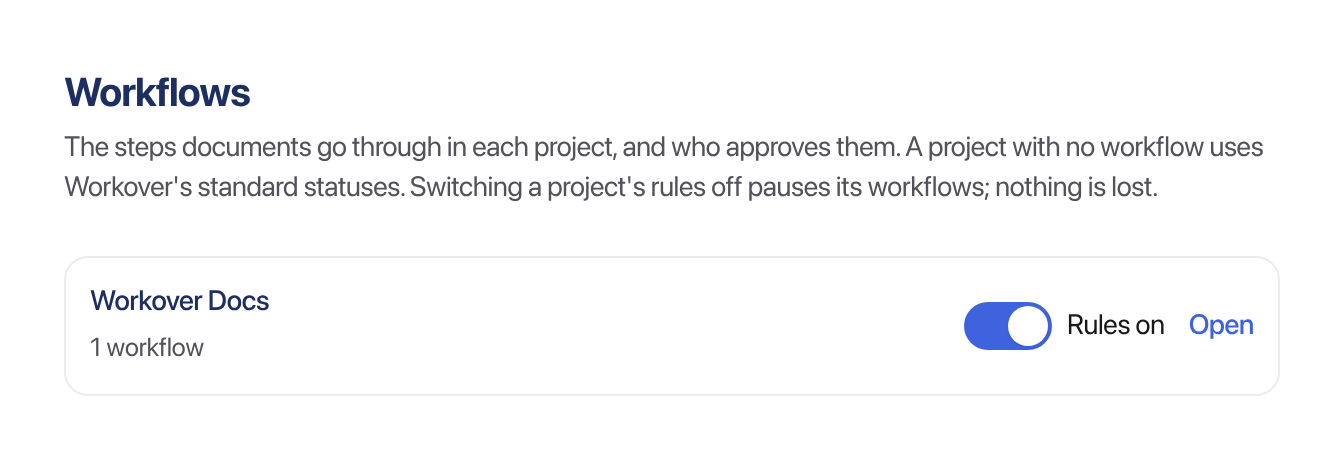
If Workover has switched workflow rules off for your whole workspace, the page says so, and every project uses the standard statuses until they are back on.
Delete a workflow
Select Delete next to the workflow. If documents are in its steps, Workover shows how many and lets you choose which status each step’s documents move to. Approval requests for steps that go away are canceled. A workflow with no documents in it goes back to Workover’s standard statuses straight away.
Related
Still need help?
Can’t find what you’re looking for? Our team is here to help.